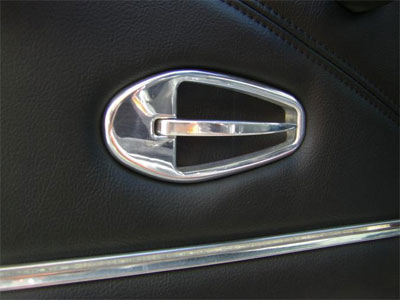
Smart Parts Interior Door Handle Installation Guide
Your Smart Parts Door Handle can be mounted anywhere on your door,
with our standard 5' cable. Also available for your trunk, hood or gas tank
door release is the longer 12'cable.
The Smart Parts Handle can be used for exterior door handles as well.
The coated housing allows for tight bends in the cable, but care should be
taken not to kink the cable.
The Smart Parts Door Handle will work with most after market and stock
door latch systems. Stock latches must be working freely without,t excessive
effort. Double clamping of the cable housing is a MUST.
When mounting Smart Parts Door Handle, make sure there is no
interference with moving parts. The cable end and spring should move freely
witho'.rt contact with the door or window.
You can either mount the Smart Parts Door Handle directly to the door skin:,
or using the bracket provided, clamp it to your door panel. TWo templates are
provided:
Left Side: Template #1 is for your door panel.
Template #2 is for your door. Click to View / Download
Right Side: Template #1 is for your door panel.
Template #2 is for your door. Click to View / Download
INSTALLATION:
1) Find an ideal location on the door panel for the Smart Parts Door
Handle. Use template #1, lay it out on the panel, trace it. then cut out this section on your door panel.
2) Place Smart Parts Door Handle on to the door and mark the handle
opening on to the door skin, also mark vertical marks from template #1
on to the door skin. Remove the door panel, line up Template #2 with the
vertical marks you have made and rnark out Template #2 on to the door
skin. Cut this section out.
3) Remove cable from the Smart Parts Door Handle by lining up slots on
tension adjuster and puliing on the housing until the housing clears the
adjuster. Pull the cable through slots and release from handle. (Reverse
this procedure to re-install) Replace door panel. Place the Smart Parts
Door Handle into the opening and mark the two screw iocations. Remove the Smart Parts Door Hancile and drill out screw locations with 1/8" bit.
4) Remove door panel. Re-Install cable onto handle. make sure the adjuster is all the way in. Run cable through the handle opening then mount handle
to the door skin. Route the cable to the door latch staying free from any
moving parts, or screw locations. Line up cable w'ith the latch arm in
direction of pull of the latch arm. Drill a hole for the cable clamp,(approx.
6" from latch farther if necessary. Mount the cable end to the latch allowing the cable end to have free movement. Install cable clamp,
keeping the cable taut as the clamp is tigfrtened. Take up the cable slack
with tension adjuster. (DO NOT OVER TIGHTEN)
5) Engage door latch and release with handle several times to rnake sure
everything works properly. If it feels like it takes more and more effort
to open the door then the cable clamp is slipping, and either you need to
tighten the clamp or add another clamp.
|

